
Occasionally I will pick up jewelry boxes when I'm out junking. I know if you have ever been in a thrift store or to a yard sale you've probably seen hundreds of these (ugly 80's looking wood) in your life but sometimes they're really cute to redo.
If you would like me to tell you my selection process and how I redo these tiny little boxes with felt on inside (usually) and ity bity hardware that is sometimes easy to remove and sometimes not.........
then read on Sista!

Big Guy
BEFORE
I really dislike this color of Brown.

I keep forgetting to take before pictures. The hardware was on when I bought it.
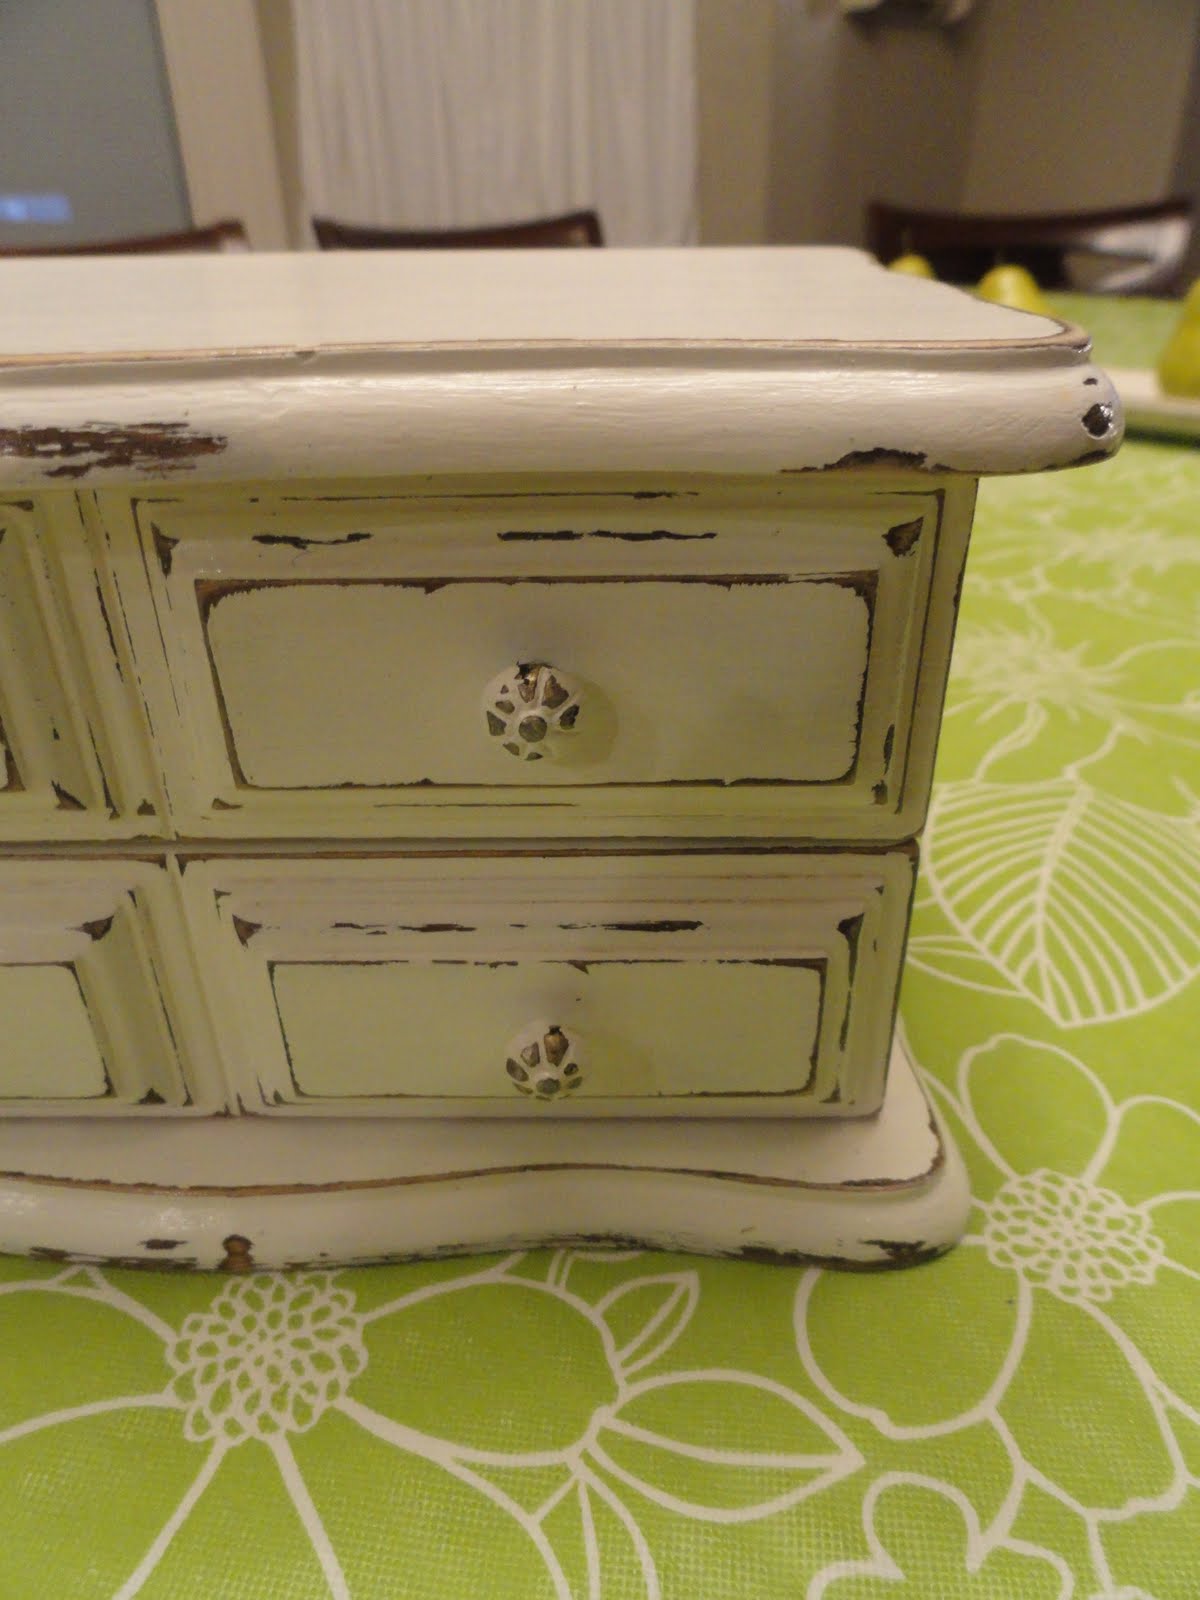
AFTER
I really like this color of Gray

Unless you are planning on becoming an ugly brown jewelry box
hoarder you are going to have to be very picky when selecting these little guys.
I look for unique cubbies, doors, drawers, hardware, pretty much anything that catches my eye.

If I'm liking the outside then I check out the inside. Most of the time the insides are covered in felt and most of the time the felt is so gross. But sometimes you find a few that look brand new inside, like this one. That's when you know you've hit the jack pot and to snag that baby up before some lady sees you totally checking it out and is just waiting for you to put it down so she can snag it from you.

Like I said these are small and they have very small parts, kinda annoying if you are as impatient as I am.
Here's how I redo them:
I usually wait until I have a couple to do & until I'm in a really crafty mood.
I use Acrylic Paint & a Sponge Brush with these little guys.
(You can clean up acrylic paint with soap and water which is kinda important when painting so close to the felt)
Sometimes I take the hardware off and spray paint it and sometimes I just paint it the same color as the box.
It just depends on how hard it is to get the hardware off. (I spray painted these)
After I have a couple coats of paint I do something to show off the cute lines, like distress it or white wash it.
This one got it all. I painted it light grey and didn't like it. I painted it white and didn't like it. I painted it dark grey and kinda liked it so I distessed it but there just wasn't enough contrast. So I white washed it and now I LoVE it.
Last I finished him off with a coat of
Water Based Polyurethane.

He even has a cute back end :)

Little Missy
BEFORE

Yes, I forgot the take the before picture.
AFTER

She has some great character &


her felt is in great condition, so I brought her home.

I would have had to remove the felt to get her knobs off so I just painted everything the same color.
She got a couple coats of white acrylic paint, distressed with 150 grit sand paper and sealed with the same water based polyurethane.
There they are LooKing all CuTE

These are for sale on my For Sale Page!
EnJoY!
I always link up to Great PaRTiES that are full of inspiration. If you don't want to miss out check them out on my PaRTiES Page .
ThaNkS for the LiNk uP LaDiES!
Wow ~ these look great! What a transformation!
ReplyDelete:)Heidi
oh my gosh the little missy is so fabulous with the yellow interior! i love jewelry boxes and this is so beautiful!
ReplyDeletep.s. i'm here from the crafty bloggers party & hop!
Wow, those are great! I love them. They look like tiny dressers. I want! 8>)
ReplyDeleteI love to makeover outdated wood items as well. Great finds and redos. The colors and distressing are perfect!
ReplyDeleteI have a weekly linky party called Terrific Under Ten Tuesdays. It's for projects made for $10 or less. I would love for you to link up sometime!
This is a great little makeover! I love it!
ReplyDeletedreaming-n-color.blogspot.com
Awesome!!! I’m your newest follower from Creative Bloggers Hop. I am the candied Apple Icon labeled Nataly. Please follow http://sweetcalifornialiving.blogspot.com/
ReplyDeleteThese are so cute! I would never have thought to grab those outdated jewelry boxes.
ReplyDeleteThanks for sharing :)
Nice! Thanks for linking up to Mad Skills Monday!
ReplyDeleteToo cute! I always pass these by. Maybe I will stop and pick some up now. Great work. -K
ReplyDeleteVery nice! I love how they turned out!
ReplyDeleteHi Carrie, I love the way your little jewelry
ReplyDeleteboxes turned out. I actually have the same Little Missy. I bought her already painted white and ready to house a small portion of my vintage earring collection. Oh, by the way, don't feel bad about forgetting to take "before" pics. You don't know how many things I've redone or re-purposed and felt discouraged to post them because I forgot to take before pictures. At least you caught yourself before it was too late. lol
Great job,
Irma
Love these! Great tip waiting til you have a couple to make them over. They look great painted out. Thanks for sharing.
ReplyDeleteI love your whole blog and am awarding you with the Kreativ Blogger Award. Swing on by to accept it.
Wow, they look really nice. You did a great job. Love it. I am your new follower, you can visit me when you have a chance at http://showmemama.com
ReplyDeleteHave a great day!
Nice job...LOVE these! Could use one myself. I'll be on the hunt!
ReplyDeleteToo cute! Now they are ready for some fancy new jewels. I will have to keep my thrifting eye out for these to give as gifts to my daughter's friends :)
ReplyDeletethis is such a great idea. I'm pretty sure I had one just like Lil Missy :) I will be looking at these little guys differently now when I'm out thrifting! thanks for sharing this at Transformations and Treasures!
ReplyDeleteHi Carrie-
ReplyDeleteThese two pieces compliment each other so nicely - I think their names are super cute too.Very clever of you. Found you on Funky Junk Interiors.
My best- Diane
Beautiful Transformation, love how they both turned out....
ReplyDeleteThese are all beautiful! Really appreciate you sharing this great post with us at the Creative Bloggers' Party & Hop.
ReplyDeleteWhat a great idea! I pass by those all the time but never would have considered giving them a facelift. :-) They look absolutely fabulous! Thanks so much for sharing them with us at Inspiration Friday this week!
ReplyDeleteVanessa
Beautiful transformations! I have thought about redoing them but never have. They really are like mini pieces of furniture! Great job and thanks for linking!
ReplyDeleteI love to buy Jewelry Cabinet
ReplyDeleteVery very nice!!! I may have to try this!
ReplyDeleteMargo @ http://piecesoflifeetal.blogspot.com