Do you Remember this?
Well LooK at her Now!
I feel like I need to explain the GReeN. See, I'm redoing my bathroom/laundry room and this
is going in there. About a year ago I went to Baby Drama's (my littlest sister) house and she had the cutest picture on her bathroom wall. I wanted to steal it but she wouldn't let me.
So she FouNd me one! Wasn't that sweet?
It's not like I love hippos or anything but it just makes me smile and I LoVE it. So this is my color scheme; hence the GReeN. Enough about that, now on with the redo.
First I had to take off this crazy piece of molding.
I just don't understand why people do this. It's not very easy to paint around the hinges. But it IS really easy to take them off.
Seriously, it took me less then 2 minutes to take them off.
I cleaned these puppies up with a little Goo Gone and elbow grease.
I needed to sand this hard glue......
and wax off. It's just easier to sand it off then clean it off (the wax I mean).
She had a lot of staple holes and some cracks that needed to be filled. Usually when you are refinishing furniture, all the holes should already been filled but if not don't worry, it's an easy fix.
This is what I like to use.
Yes, I am using my finger! I just think it easier and it washes off easy.
Just fill all the holes and cracks. Don't worry about making it too smooth because you are going to sand it smooth anyways. It dries really fast.
So now she's ready for her sand down.
Make sure she is sanded smooth everywhere. This is an important step because it will give you a nice finish in the end.
I like to round off any sharp corners. I think it gives it a softer look.
This is the door after sanding.
Here is a little trick I came up with. I put toothpicks in small holes that I need to find later (like where the hinges go). That way they don't get paint in them.
After she has been primed she is ready for her molding. I used Kilz Spray Primer and I primed the molding before I put it on.
When measuring the molding; measure to the inside of the 45 degree angle.
I will take more pictures next time.
I only used Liquid Nails because the pieces of molding were so small (usually I would use finishing nails too).
I put a good amount of glue on th back and fit them into place. Then I taped them for support and let them dry for about 30 minutes.
I used Paintable Acrylic Latex Caulk. (Just make sure it's paintable)
Then I gave her a couple coats of paint, a little sanding, distressing and then put her back together.
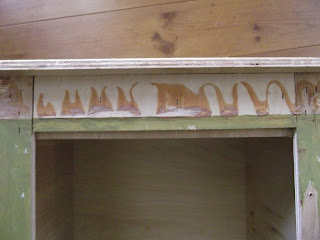
But I couldn't really see the cute molding. There wasn't enough contrast. So after talking to G Daddy I decided to put a GReeN glaze on it. I don't know what I was thinking but it was late and it sounded like a good idea.
I did't have the right color so I made my own.
I think I did a pretty good job matching the colors.
I put this watered down GReeN acrylic paint all over and then wiped most of it off.
This was before I wiped it off. I know, it looks GRoSS.
This is how it turned out. I'm not sure if I love it but I'm going to leave it until I'm done with the bathroom and then I will see how I feel about it. What do you think?
I finished her off with some
RUST-OLEUM
Crystal Clear Enamel Spray
Here are a couple other things I painted to go in the bathroom too.
Thanks for visiting and I
hope you EnJoYeD yourself!
Thanks For the LiNk uP LaDieS!
These are some great blogs I link to. If you are looking for good ideas go to these linking parties.


Carrie,
ReplyDeleteThanks for the great tutorial! The pictures are so helpful. I think the green glaze looks great, and I love the hippo picture.
Much better!!! Very cute!!
ReplyDeleteI love that green!
I just became your latest follower!
Stop by and say hi when you can!
I wondered what you were going to do! It looks great! Thanks for linking up!
ReplyDeleteThe cabinet turned out great and I LOVE the green frame that you put the picture in!
ReplyDeleteGreat job! I love the way it turned out, looks beautiful.
ReplyDeleteI am a new follower from Chic on a Shoestring, I would love if you could stop by www.mooseandtater.com
I think it's super duper cute! I like the green a lot! I've never thought of glazing with a color beyond black, brown or white- oh, the possibilities!
ReplyDeleteKate @ welcomedtempest.blogspot.com
hiya , great project and tutorial too , i am not a lover of green but it suits tis piece so well as a contrast colour x tfs
ReplyDeletexmaggiex